Configuring Your POP or IMAP Email Account in Windows Live Mail
Configuring Your POP or IMAP Email account in Microsoft Windows Live Mail
This tutorial shows you how to set up Microsoft Windows 7 Live Mail e-mail account. This tutorial focuses on setting up Windows Mail, but these settings are similar in other versions of Microsoft mail including Outlook.
To Set Up Your E-mail Account in Windows 7 Live Mail
In Windows Mail, from the E-mail Accounts menu, select Properties - you will need to be on the correct email account to do this.
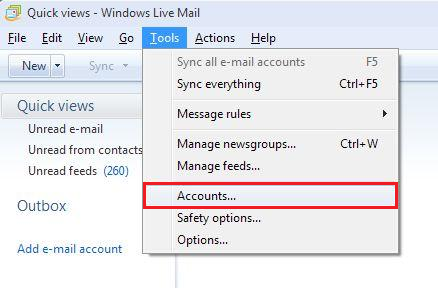
- Firstly you will need to open your account on the mail menu under TOOLS then select ACCOUNTS
- On the E-mail Accounts wizard window, select Add a new e-mail account, and then click Next.

- Select EMAIL ACCOUNT then NEXT

- Here you can enter your NAME, EMAIL ADDRESS & DISPLAY NAME
- Select "Manually Configure Server..." then Next

- Enter the following details as follows:
For your server type, select POP3 or IMAP, and then click Next. - Incoming mail server
mail.yourdomain.com.au PORT: 110 or 143 for SSL - Log on using: CLEAR TEXT AUTHENTICATION
- Login ID:
yourname@yourdomain.com.au - Outgoing mail server
mail.yourdomain.com.au PORT: 587 or 465 for SSL - This server requires a secure connection (SSL) OPTIONAL
- My Outgoing Server requires authentication - USE SAME SETTINGS AS INCOMING SERVER

Click Next and then Click Finish.
NOTE: This information has been provided as a courtesy about how to use certain third-party products, but we do not endorse or directly support third-party products and we are not responsible for the functions or reliability of such products. Windows Mail & Outlook 2003® 2007 & 2010 are registered trademark of Microsoft Corporation in the United States and/or other countries. All rights reserved.